Recently I had work on a Union Feature as an additional Rigging Lighting Console Programmer. My work that day was assisting the Shooting LCP prep a set for a dance sequence in the film. The rig was built and all the wire was run, now it was time to timecode the show.
We were using a Sound Devices MixPre 10 to send SMPTE to the console, an ETC Apex 10, and send audio out to a speaker. It is pretty standard to split timecode into one channel and mix your audio to mono in the other. This worked perfectly and using macros we were able to learn all of the timecode we needed on the console.
Fast forward a few days and I’m sitting in my studio playing around with my EOS master showfile. I want to find a way to replicate the union feature setup on a smaller scale for Music Videos.
I don’t personally own a MixPre 10, so I thought I would have to rely on a software solution for timecode.
When I do music videos, I often find myself with only a small crew or no crew at all. As such, audio playback usually falls on me since I’m timing my lighting cues and I want to be able to start the audio at the same time I press go. This is obviously frustrating and doesn’t allow for perfect sync. This is where timecode comes in.
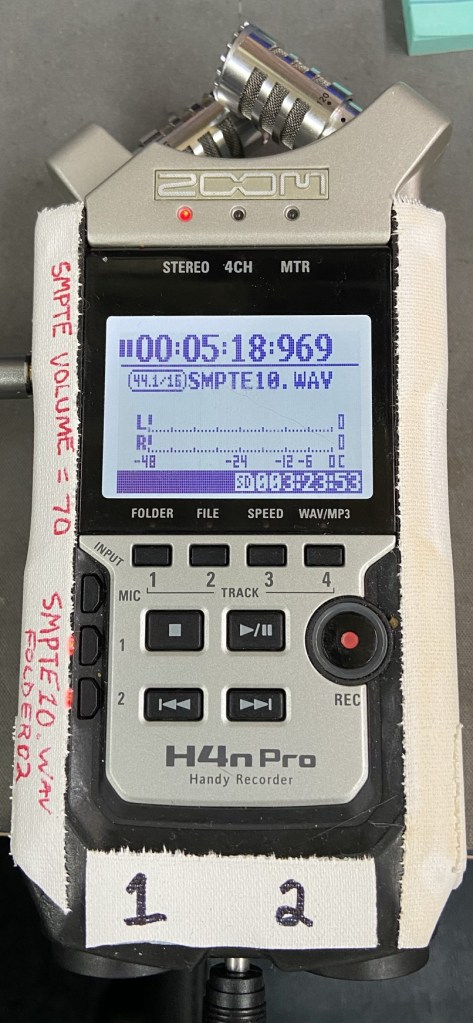
Since the ZoomH4n Pro has a stereo line out, I can do exactly what I was doing with the MixPre, at a fraction of the cost.
First thing to do is to prepare the files. I used FFMPEG to make my files able to be played back on the H4n.
- 44.1kHz, 16-bit PCM, stereo
- Left Channel: Song
- Right Channel: LTC timecode
Once prepped simply load the SD card into the H4n and select the track that you want to playback.
To route the Timecode to your console you’ll need an ETC Response SMPTE Gateway. From the line out on the H4n, I split the stereo signal using a 1/8 to dual male XLR. The left channel goes to my speaker, the right channel goes to the SMPTE Gateway. I set the H4n output volume to about 70 which balances the audio to about -6db. When I play a track on the H4n, the Gateway picks up the LTC and sends it to EOS. If all is working correctly you’re off to the races! The H4n allows you to scrub through tracks for easy playback of specific parts of a track, making it super handy for video work.
For each song I have the timecode start an hour later so that the console will be able to tell each track apart. For example for Track 1, LTC starts at 00:00:00:00. That way when I scrub anywhere in the song, the timecode will correspond with the timestamp in the song. 3:43 is 00:03:43:00, 4:25 is 00:04:25:00 and so on. For Track two LTC starts at 01:00:00:00. 3:43 in that track is 01:03:43:00. This allows me to set the time for cues on the console for specific tracks without worrying about them overlapping.
Overall this is a little solution using one of my favorite Swiss Army knife tools, the Zoom H4n. I bought it back in film school and the thing is still going strong after all these years. There are other and much better ways to accomplish this, but this workflow will come in handy for me.
Got any timecode tips? Let me know!
Zach

Leave a comment